Add Listings
In this training module, you’ll learn how to add a listing, a crucial skill for growing and maintaining your directory. Initially, it’s recommended that you handle listings yourself to lay a solid foundation for your directory. This hands-on approach gives you valuable insights into the process, which can be useful if you decide to outsource this task later on.
The Information-Collecting Template
This template helps you efficiently gather essential business information for inclusion in your directory. It can also be exported to CSV to use with the CSV Import plugin. You can gather the information yourself, give the template to your freelancer/VA if you choose outsource this task.

To access the information-collecting template, simply follow the link below to the Google Sheet. Once there, click “Make A Copy” to save the template directly to your Google Drive. You will need to sign in to a Google account to proceed with this step.
Add A New Listing Manually
To add a new listing to your directory, from your WordPress dashboard, navigate to “Restaurants” and then select “Add New Restaurant’.
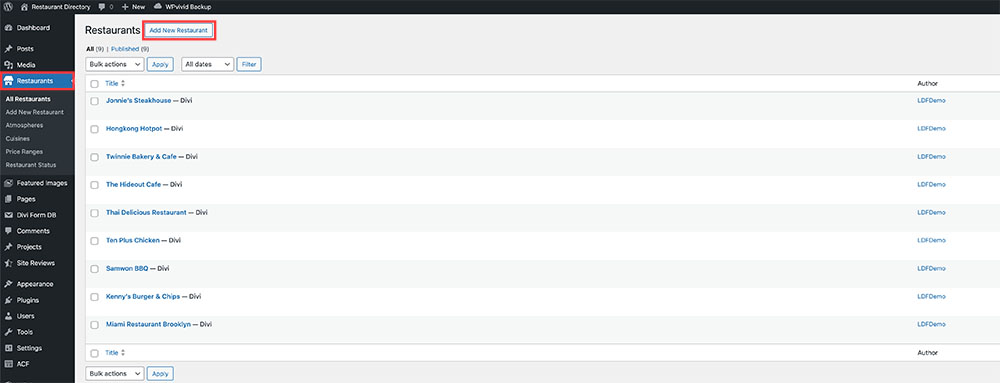
On the “Add New Restaurant” page, after entering the restaurant name/title, it’s crucial to carefully fill in the specified fields.
1 & 2: Website Address & Phone Number
3- Phone Link: Must follow the phone format for Click-to-Call button on profile page.
4- City, State/Neighborhood: Appears on the profile module and can be a search term. So you can make it ‘Brooklyn, NY’, or ‘Downtown Brooklyn’ or ‘City Central’.
5- Full Address
6- Average Rating: Assign a rating based on your evaluation or findings from your research to reflect their standing.
7- Opening Hours
8- Main Courses: This field is optional. However, providing information here can enhance the visibility of the business in search results.
9- Atmosphere: Provide details such as ‘casual’, ‘fine dining’, ‘work-friendly’, or ‘kid-friendly’ to describe the atmosphere of the restaurant. If you don’t know this information, you can leave this field blank.
10- Cuisines: Specify the main cuisines offered by the restaurant. You may list one or two cuisines here. Keep in mind that this information will appear on the listing home page, so if it’s too lengthy, it may affect the overall appearance.
11- Price Range: Indicate the affordability level using symbols such as $, $$, $$$, or $$$$ to represent cheap, moderate, expensive, and luxury, respectively. This information is commonly available on listings or Google Business Profiles.
12- Restaurant Status: If you wish to designate this restaurant as ‘featured’, please type exactly: ‘Featured’. Otherwise, leave this field blank.
13- Select a featured image for the listing.
Once you’ve filled in all the fields, you’ve crafted a basic profile. Simply hit ‘Publish‘ to make the profile live. If you possess additional details, use Divi Builder for a more comprehensive profile (See below).
Start by listing as many restaurants in your chosen area as possible, then kick off your directory promotion. Next, you can encourage businesses to claim their listings. Detailed strategies for promotion will be discussed in the ‘Promote Your Directory’ module later.
Bulk Import Listing
Once you have collected restaurant information in the Google Sheet, you can save it in CSV format and utilize the pre-installed CSV import plugin to import all the listings at once. Follow these steps:
1- Save the file as CSV

2- Navigate to your WordPress dashboard and access ‘Ultimate CSV Importer Free’.
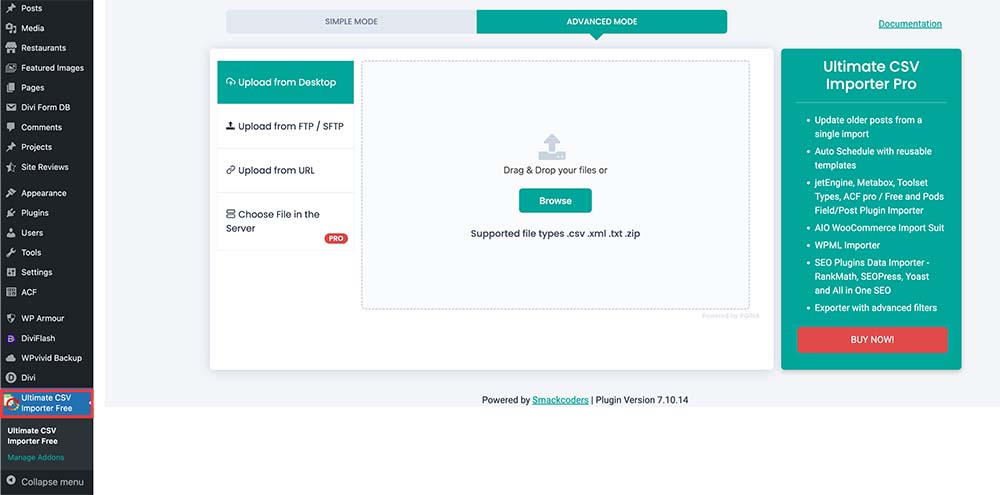
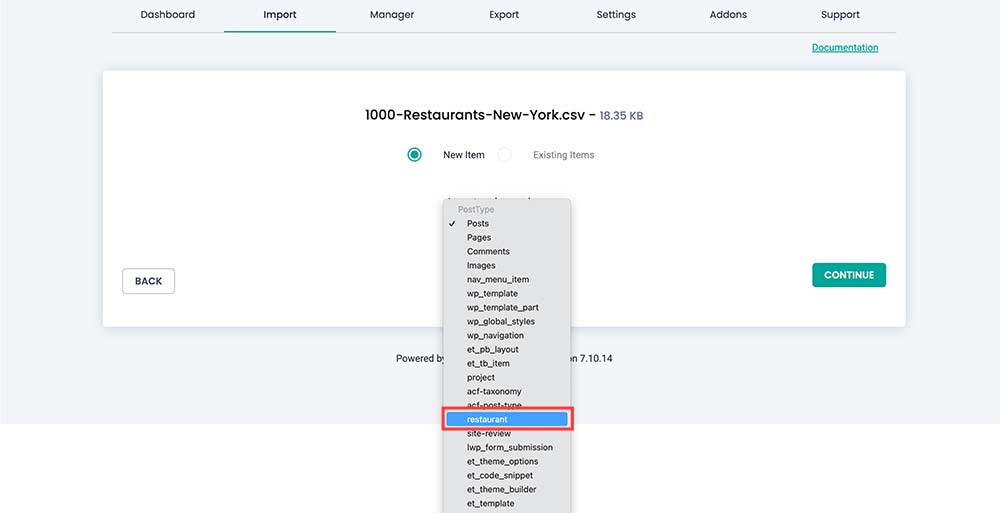
5- Assign the fields to the columns strictly following the combinations below:

WordPress Core Fields:
- Title – Restaurant Name
- Leave Other Fields Empty
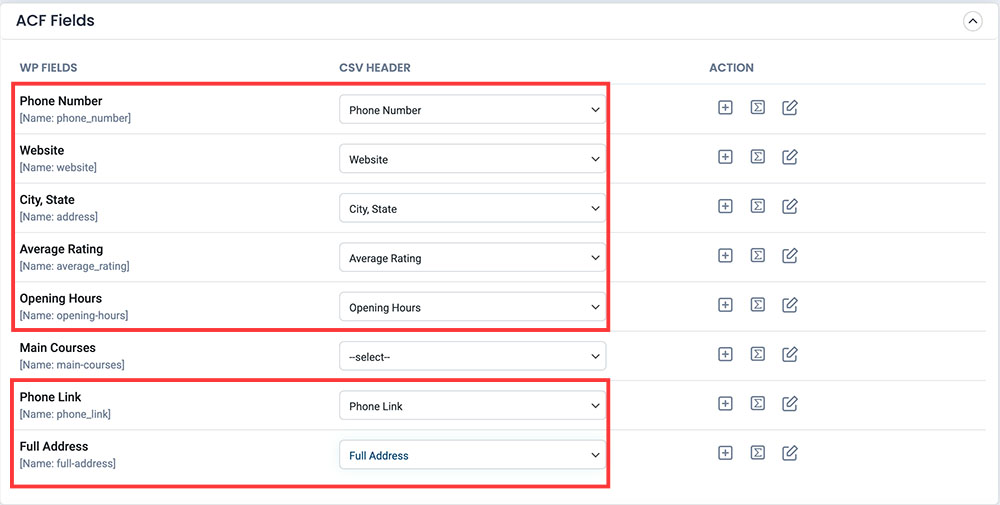
ACF Fields:
- Phone Number – Phone Number
- Website – Website
- City, State – City State
- Average Rating – Average Rating
- Phone Link – Phone Link
- Full Address – Full Address

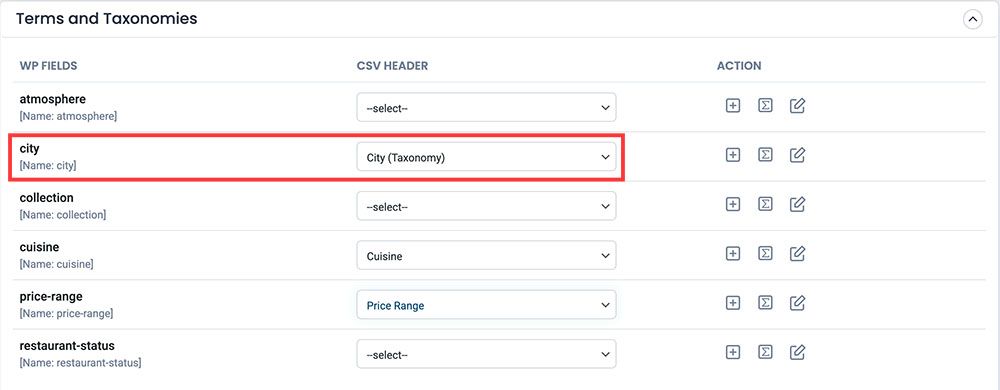
Terms and Taxonomies:
- cuisine – Cuisine
- price-range – Price Range
- City, State – City State
*IMPORTANT* IF YOU USE UPGRADE SITE – MAKE SURE TO ASIGN THE CITY FIELD TO TAXONOMY
- city – City (Taxonomy)
6- Scroll down and click ‘Continue’
7- Click ‘Continue’ with Media Handling
8- Click ‘Start Import’ and wait for a few seconds


