Getting Started – Restaurant Directory
Welcome to your journey with Local Directory Fortune! In this training module, I’m going to walk you through the installation process, step by step. You’ll learn everything you need to know to get your directory up and running smoothly and efficiently. Whether you’re a tech newbie or a seasoned pro, I’ve got you covered with clear, easy-to-follow instructions.
Overview
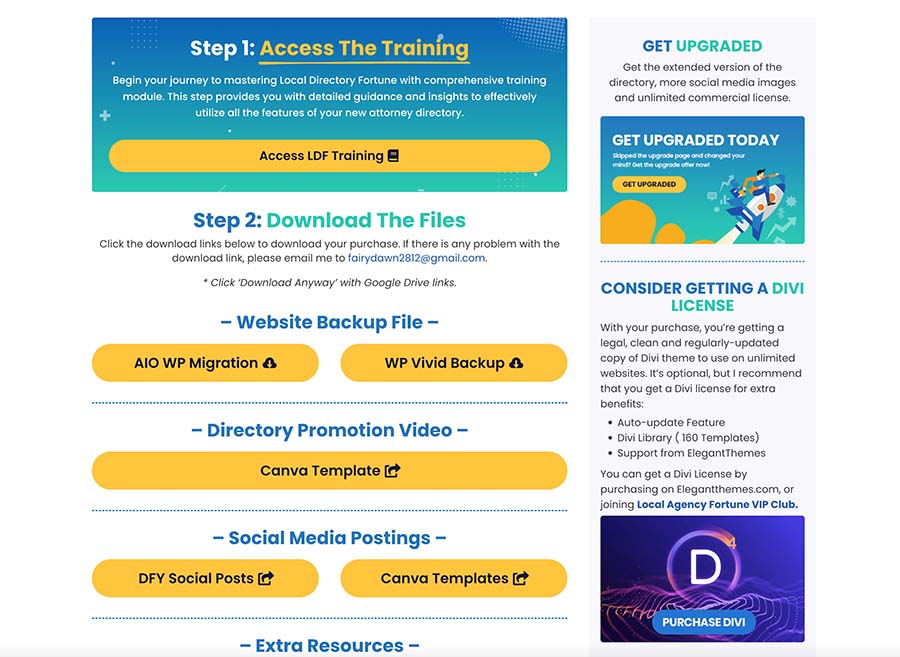
On the download page, located just below the training link, you’ll find all the necessary download and access links for the files and materials included in Local Directory Fortune. After you’ve navigated through the training and have a solid understanding of the system, you can return to this page to download your files. This ensures you have everything you need to successfully launch and manage your directory.
Demo Installation Video
To get a clear view of the installation process for Local Directory Fortune, make sure to watch this quick video. It offers an easy-to-follow visual guide. After watching, you can also refer to the detailed step-by-step instructions below the video.
Installing the Directory with WPVivid Backup
To install the directory using WPVivid Backup Plugin, follow these steps:
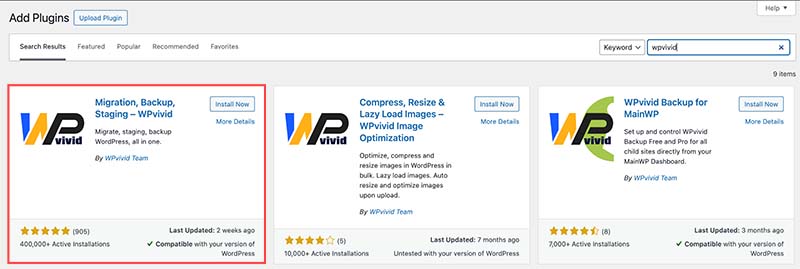
– Navigate to the WordPress Dashboard, go to ‘Plugins‘, and then click on ‘Add New‘.
– In the plugin search bar, type ‘WPVivid‘ or ‘WPVivid Backup.
– Find the plugin in the search results, click ‘Install‘, and then ‘Activate‘ it.
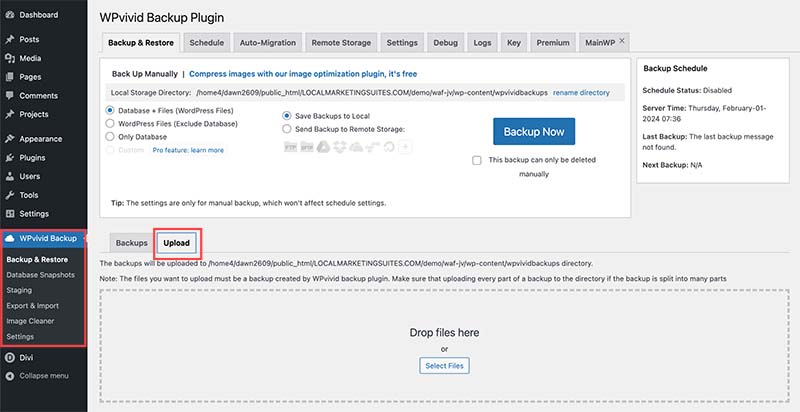
– Navigate to ‘WPVivid Backup > Backup & Restore‘ in your WordPress dashboard, then click on ‘Upload‘.
– Browse your computer for the import file you downloaded from the Local Directory Fortune download page, select it, and start the import process.
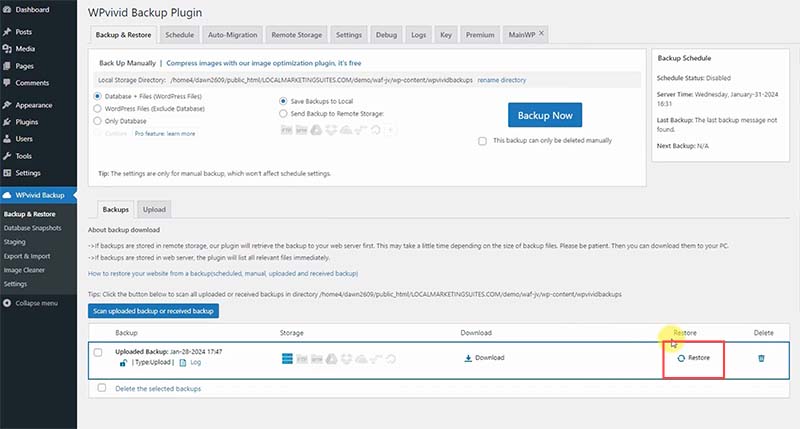
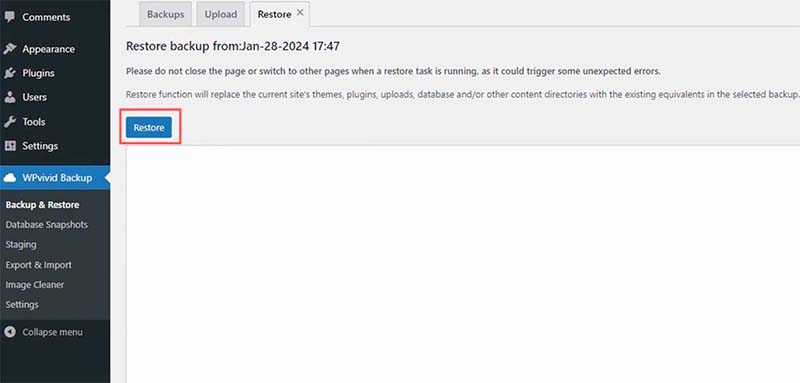
– After uploading the file, click ‘Restore’ to proceed with the backup.
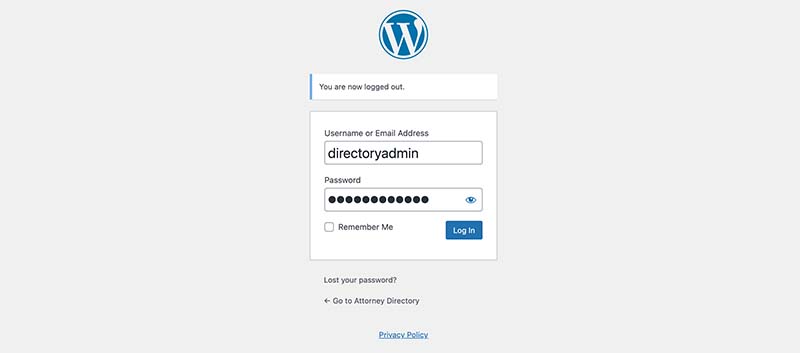
– When the installation process is complete, you will be redirected to the WordPress login page. You will have to use the credentials below to login:
Username: directoryadmin
Password: G4tLJs73Dn0w
Installing the Directory with All-in-One WP Migration
To install the directory using All-in-One WP Migration, follow these steps:
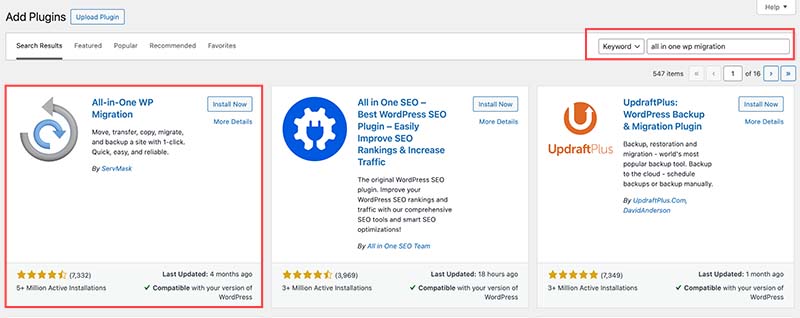
– Navigate to the WordPress Dashboard, go to ‘Plugins‘, and then click on ‘Add New‘.
– In the plugin search bar, type ‘All-in-one WP Migration‘.
– Find the plugin in the search results, click ‘Install‘, and then ‘Activate‘ it.
– Navigate to ‘All-in-One WP Migration‘ in your WordPress dashboard, then click on ‘Import‘.
– Browse your computer for the import file you downloaded from the Local Directory Fortune download page, select it, and start the import process.
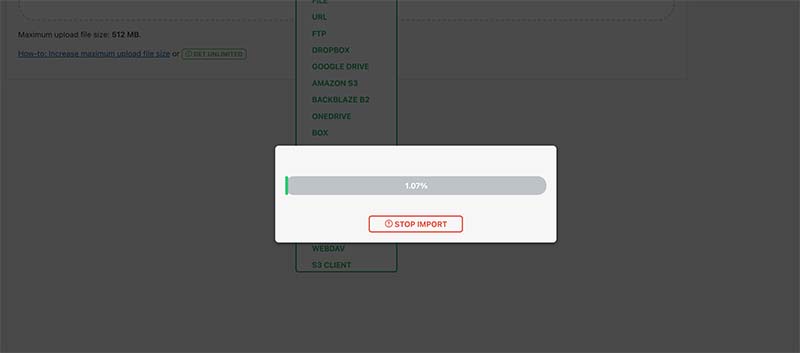
Username: directoryadmin
Password: G4tLJs73Dn0w


*IMPORTANT* Change Your Admin Username
It’s crucial to change your admin username after installing the directory, as all customers initially receive the same backup file with identical default credentials. To simplify this process, the Username Changer plugin has been pre-installed. Here’s a brief overview of the steps:
– Go to ‘Users’ and click ‘Edit’ on the ‘directoryadmin’ username.

– Navigate to ‘Username’ and click the ‘Change Username’ button.
– Enter your preferred username.
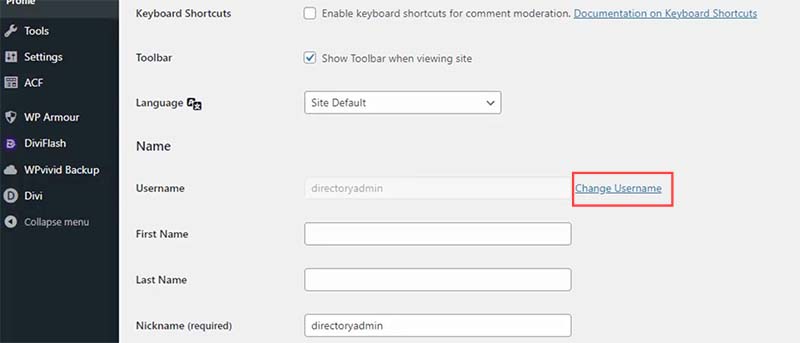
– Scroll down to Change the admin email address and confirm the new email in your inbox.
– Scroll down to update the password.
– Click ‘Update Profile’ to secure your new credentials.
– After changing your admin username, you can go to Plugins and delete the Username Changer plugin.
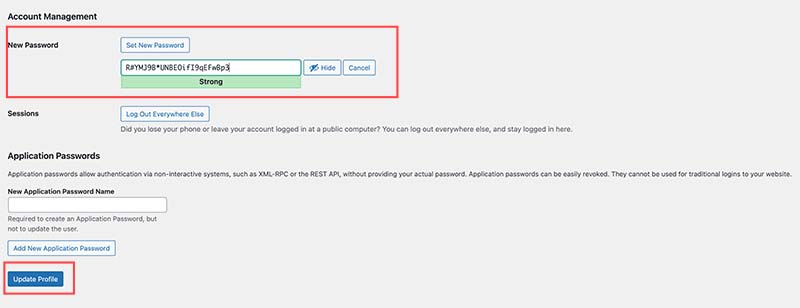
Website Overview
Now that your site is set up, it mirrors the demo seen on the sales page. Here’s what you need to know:
– Your site is powered by the Divi theme and initially includes 10 default plugins. If you remove the Username Changer and the backup plugin, this number drops to 8. This setup is designed to provide you with a robust, ready-to-use website equipped with essential functionalities right from the start.
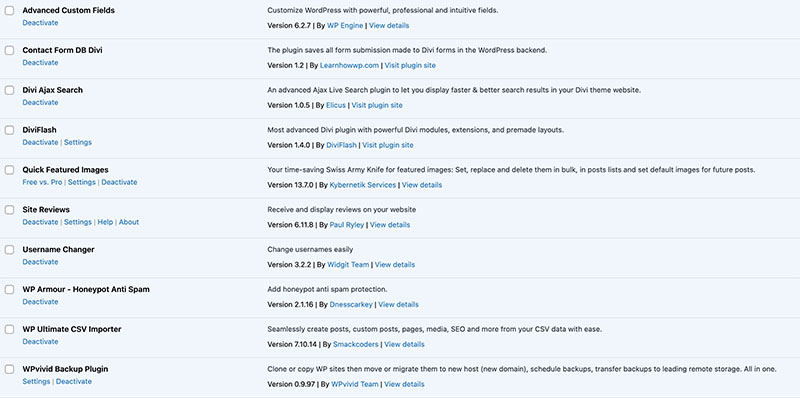
To ensure your directory site operates at its best, these 8 essential plugins play crucial roles:
1- Advanced Custom Fields: Vital for crafting custom post types like ‘Profiles,’ enabling detailed listings.
2- Contact Form DB for Divi: Captures and saves all contact form submissions directly on your site, ensuring no lead is overlooked.
3- Divi Ajax Search: Enhances your site with a powerful live search feature, making information easily accessible.
4- Divi Flash: Adds specialized custom modules to your website for enhanced functionality.
5- Quick Featured Images: Automatically creates a default featured image for the imported listings.
6- Site Reviews: Provides a customer review system for the listings.
7- WP Armour: Offers protection against bot-driven spam on your contact forms, safeguarding your site’s from spamming bots.
8- WP Ultimate CSV Importer: Lets you bulk import listing with CSV files easily.
Other plugins can be deleted without affecting the core website functions.
