Add A Listing
In this training module, you’ll learn how to add a listing, a crucial skill for growing and maintaining your directory. Initially, it’s recommended that you handle listings yourself to lay a solid foundation for your directory. This hands-on approach gives you valuable insights into the process, which can be useful if you decide to outsource this task later on.
The Information-Collecting Template

Information-Collecting Template
Add A New Profile
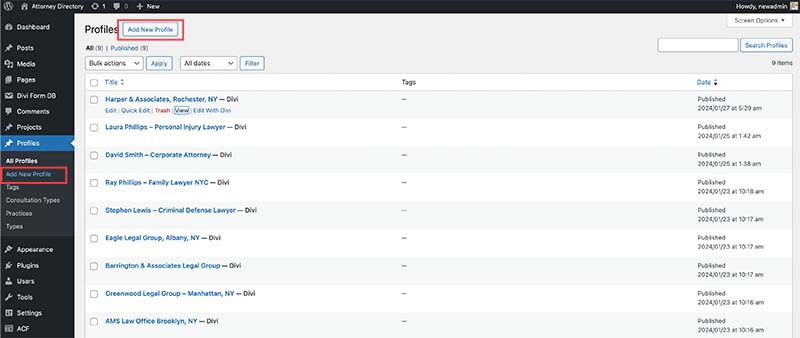
To add a new lawyer profile to your directory, from your WordPress dashboard, navigate to “Profiles” and then select “Add New”.
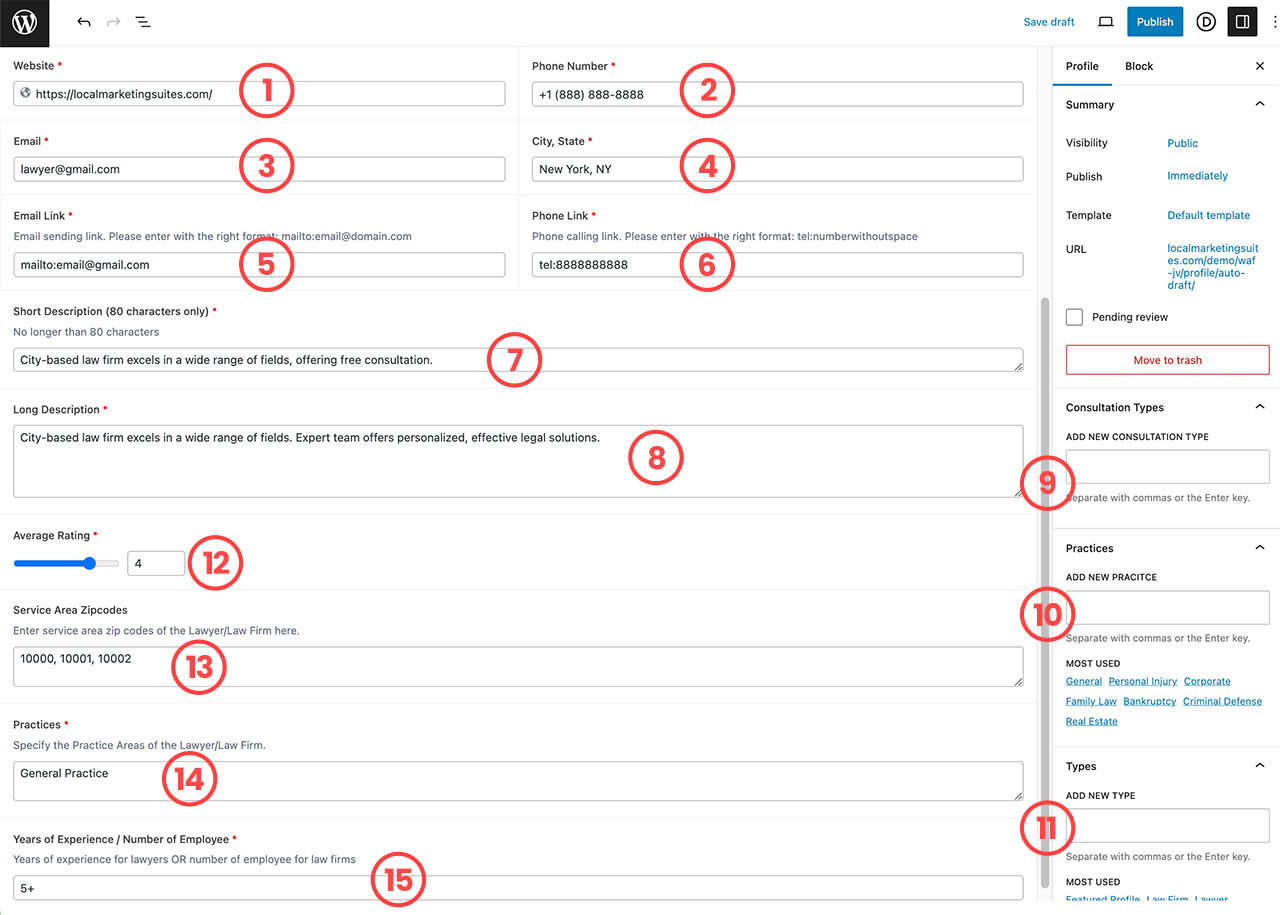
5- Email Link: Must follow the email format mailto:emailaddress for Click-to-Email button on the profile page.
6- Phone Link: Must follow the phone format for Click-to-Call button on profile page.
7- Short Description: Appears on the profile module on various places. No longer than 80 characters.
8- Long Description: Appears on the profile box on profile page.
9- Consultation: Type ‘Free’ and select ‘Free Consultation’ from the dropdown IF the law firm offer Free Consultation.
10- Practice Areas: Initially type in the primary practice area of the law firm, then choose a corresponding area from the dropdown menu to ensure accuracy.
11- Profile Type: Start by selecting either ‘Law Firm’ or ‘Lawyer’ to categorize the profile. To highlight a profile, add ‘Featured Profile’ as an attribute.
12- Average Rating: Assign a rating based on your evaluation or findings from your research to reflect their standing.
13- Service Area Zipcodes: Preferably, this information should come directly from the lawyer. Lacking this, use their business address zip code as a placeholder.
14- If applicable, list up to five secondary practice areas to offer a broader view of their expertise.
15- Specify the lawyer’s years of experience or the size of the law firm, whichever is relevant.
After filling these 15 fields, scroll down a bit and set a featured image for the profile.

A Featured Image should be a SQUARE image for an optimal appearance accross the site.
Once you’ve filled in all the fields, you’ve crafted a basic profile. Simply hit ‘Publish‘ to make the profile live, marking it as an ‘UNCLAIMED LISTING‘ initially. If you possess additional details, use Divi Builder for a more comprehensive profile (See below).
Start by listing as many lawyers and firms in your chosen area, then kick off your directory promotion. Next, you can encourage businesses to claim their listings. Detailed strategies for promotion will be discussed in the ‘Promote Your Directory’ module later.
Add Detailed Information to the Profile
After publishing a basic listing, you can enhance it by clicking ‘Use Divi Builder‘ to add comprehensive information to the profile.
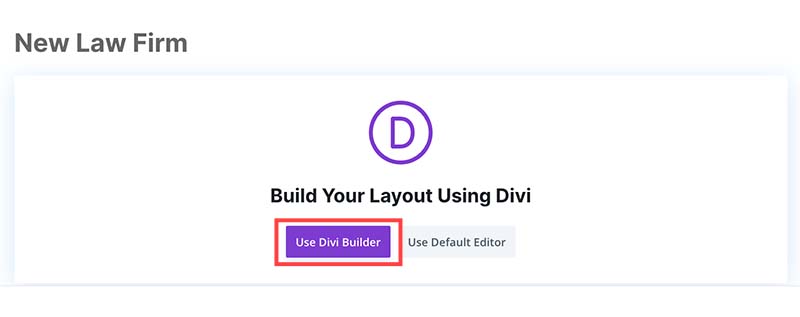
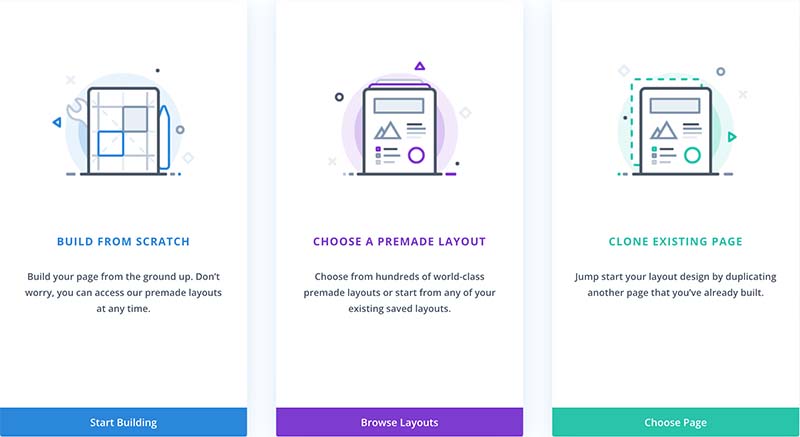
When you launch Divi Builder, 3 options will show up as below. Click “CHOOSE A PREMADE LAYOUT“
Next, select ‘YOUR SAVED LAYOUTS‘ and choose either Lawyer Profile or Law Firm Profile according to the profile type you’re creating.
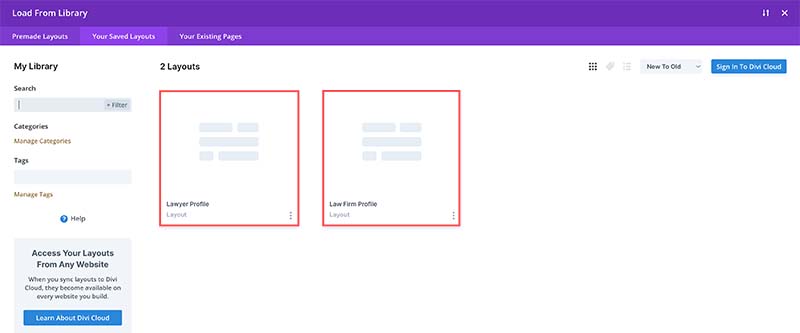
If you accidentally click ‘Build From Scratch‘ or don’t see the premade layout selection, you can click to the (+) icon at the bottom function menu to open that.
Check the box for ‘Replace Existing Content‘ and click ‘Use This Layout‘.

Detailed Profile Page
After importing the default profile layout. Your profile page will look like this:
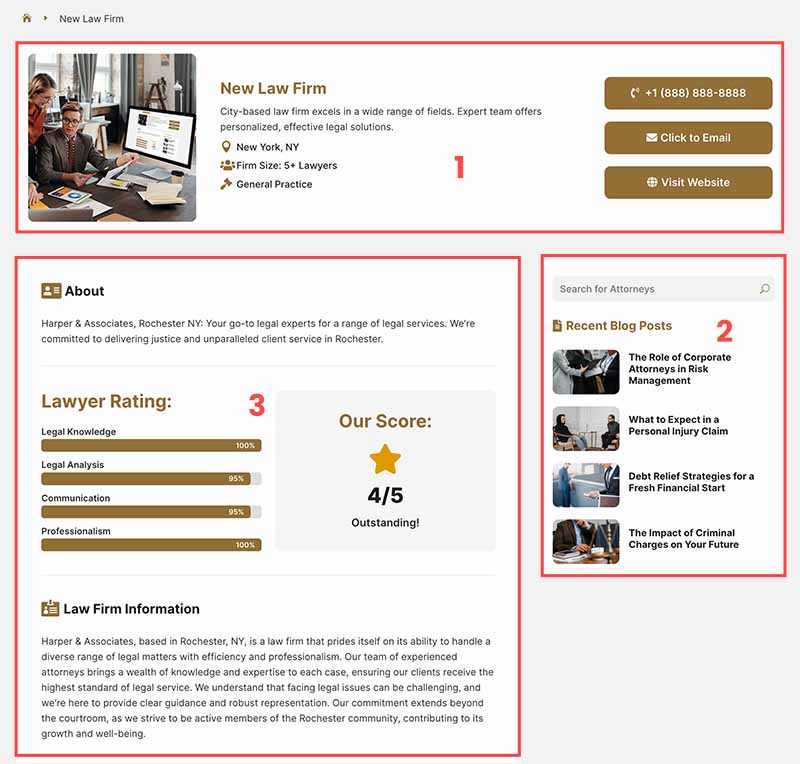
2- Sidebar: can be edited in the Theme Builder but if you are not familiar with it, don’t touch it.
3- The detailed information: Including some easy-to-edit modules, this part is where you will fill in the details of the lawyer or law firm.
Add A Map
Once you have filled in the detailed information to the profile, you may want to include a map which adds significant value by enhancing locational transparency and making it easier for clients to find the law firm or lawyer’s office.
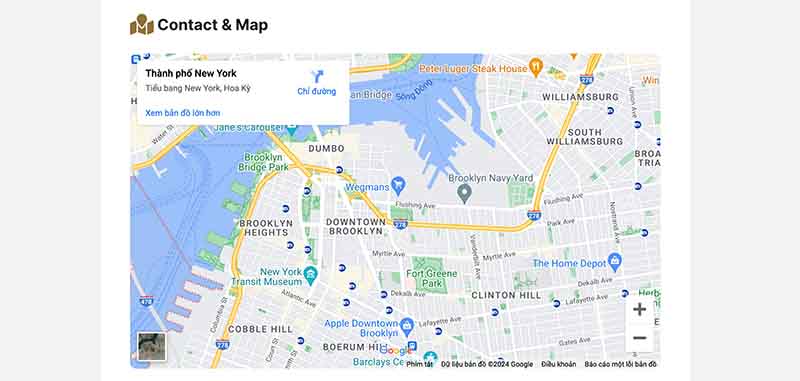
While the Divi Map Module is an option, it requires a Google Map API key. An alternative is to use an embed map code directly from Google. To do this, follow the steps below:
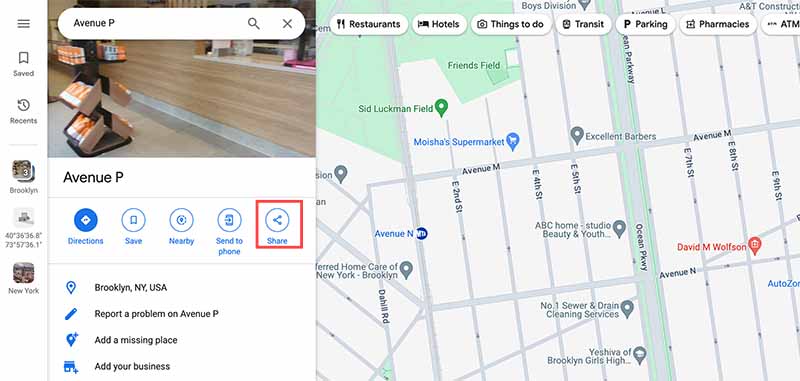
1- Go to google.com/maps and search for the location. Click on the “Share” button on the left menu.
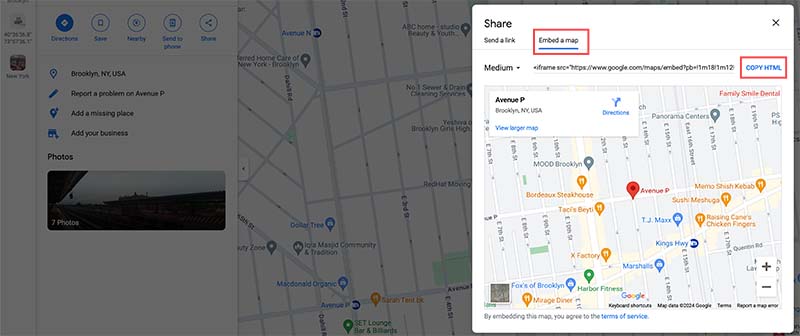
2- On the ‘Share a map‘ box, click ‘Embed a map‘ and then ‘COPY HTML‘.
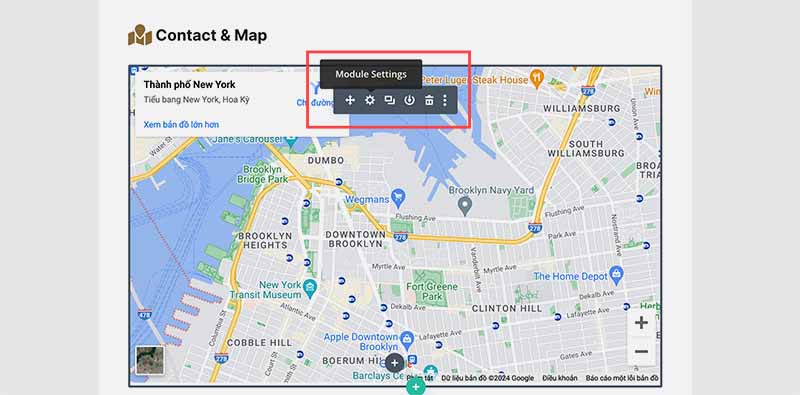
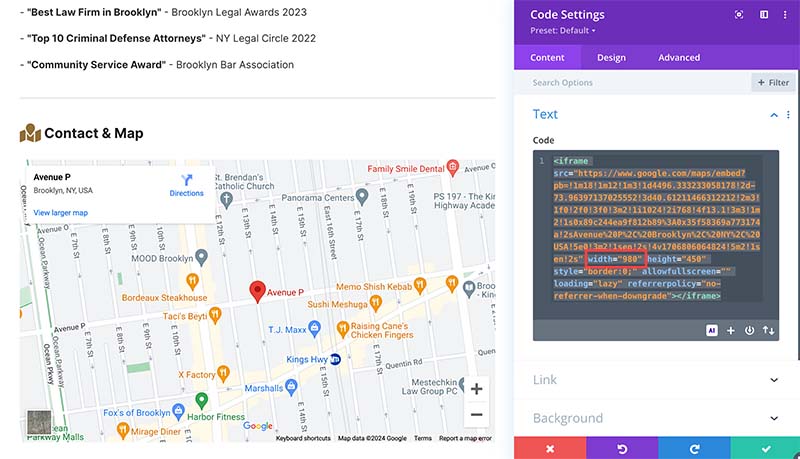
4- Looking at the embed code, you’ll find the ‘WIDTH’ value of the map. Change it to 980 to make sure the map appear properly on the profile.
