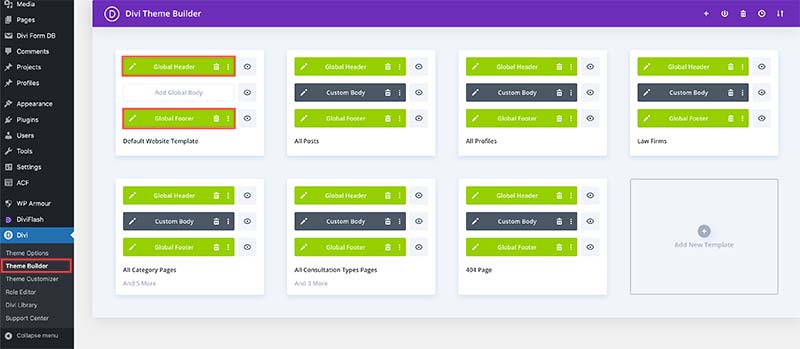
To customize your site’s header, footer, and menu with Local Directory Fortune, this training module is your go-to guide. Divi’s Theme Builder feature is the control center for these elements. Simply navigate to “Divi > Theme Builder” in your WordPress dashboard to start editing.
– To tweak your header and footer, simply click on them within the Theme Builder. You’ll find various templates on the Divi Theme Builder, but you only have to edit the ‘Global Header’ and ‘Global Footer’ for site-wide updates.
– If you’re new to Divi’s Theme Builder, it’s wise to avoid adjusting other modules like ‘Custom Body’ to prevent unintended changes.
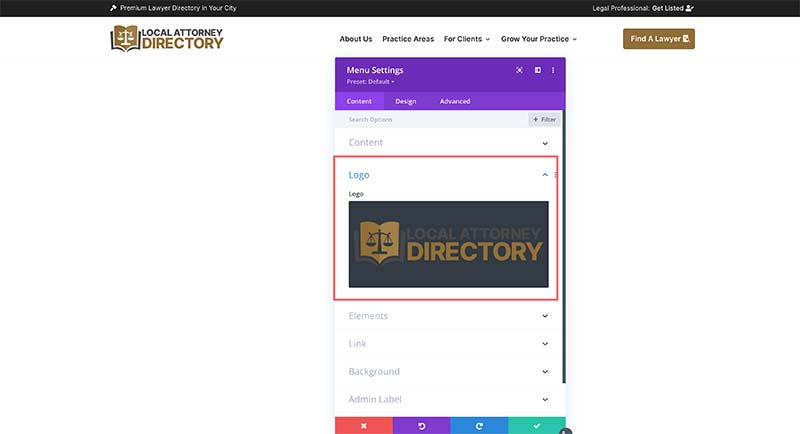
The header is already set up well, so typically, you might just want to update the brand color or logo. To change the logo, navigate to the menu module settings within the Theme Builder. There, you’ll find an option for ‘Logo’ a little way down the menu, where you can either browse for or upload a new logo.
Once you’ve updated your logo, adjusting its size is easy. Head over to the Design tab, scroll to ‘Sizing,’ and there you’ll find the ‘Logo max height’ option. Adjust the number until the logo looks just right on your site. This allows for fine-tuning to ensure your logo perfectly fits the header’s aesthetic.
If you want to edit the top bar text but find it hard to click to the module on the live builder, you can use the ‘Wireframe view’ or ‘Layer View’ by clicking on the icon on the bottom center. It will opens a navigation where you will find these features.
After Editing, click the green ‘Save’ button on the bottom right, or Press Ctrl+S on PC (⌘+S on Mac).
Editing the Global Footer
Editing the Global Footer is straightforward. Begin by customizing elements like the logo, text description, social media links, and the copyright text at the bottom bar. You can easily navigate through the modules to input your information, ensuring your footer aligns with your brand identity and provides essential information to your site visitors.
After Editing, click the green ‘Save’ button on the bottom right, or Press Ctrl+S on PC (⌘+S on Mac).
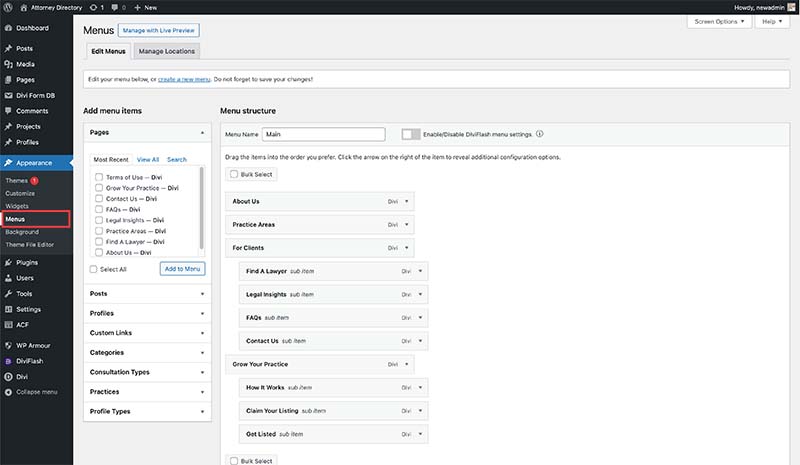
Editing the menu in WordPress is managed through the ‘Menus‘ function under ‘Appearance‘ in your WP dashboard. Here, you can add or remove items, create sub-menus, and rearrange links to best fit your site’s navigation structure. This area allows you to customize your menu names. You can add new menu items, remove menu items you don’t need, and adjust structure easily by dragging and dropping.


