Create Listings with Contact Form Entries
If you’re using the extended directory, this feature isn’t necessary.
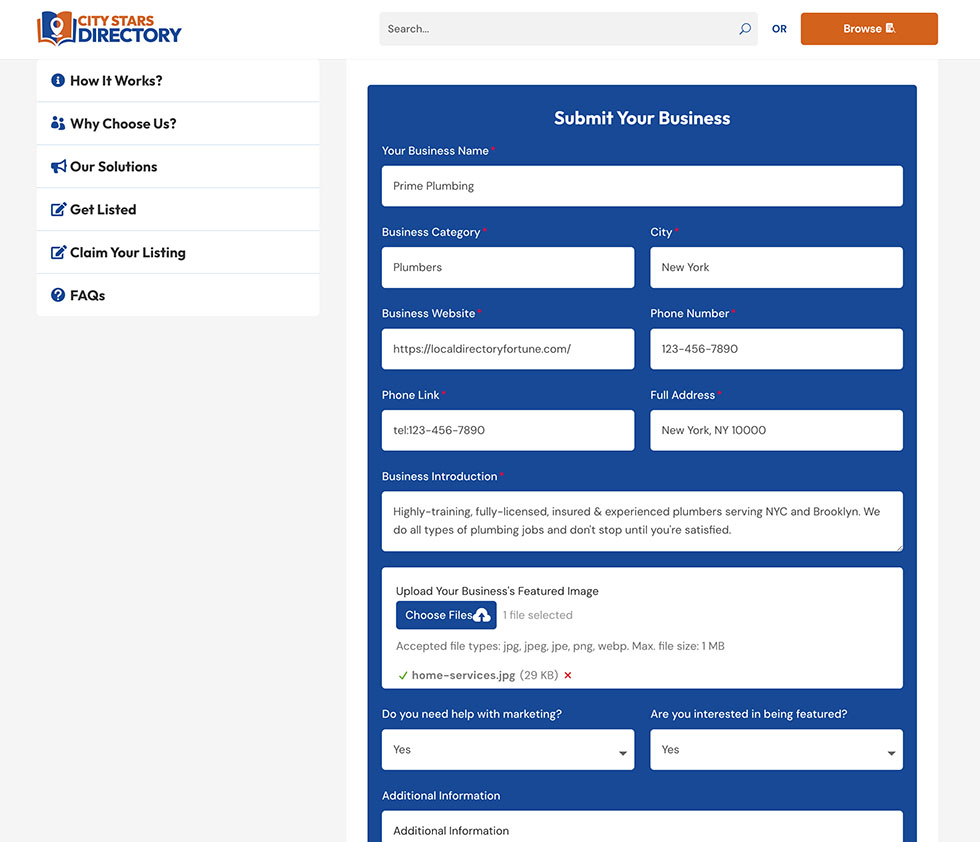
The Standard Directory does not include an account system, but I’ve designed a simple way for businesses to submit their listings. Businesses can visit the ‘List Your Business’ page and fill out the form with their details, including a photo to use as the featured image.

Once the form is submitted:
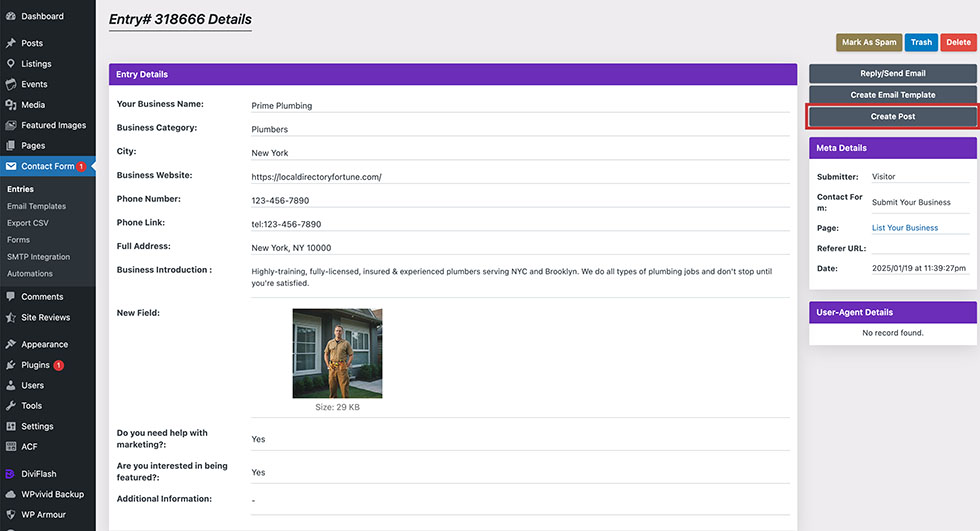
- Go to the admin dashboard, navigate to Contact Form, and view the entry.
- You’ll see a preview of the form entries containing the business information.
- Click the ‘Create Post’ button in the top-right corner.


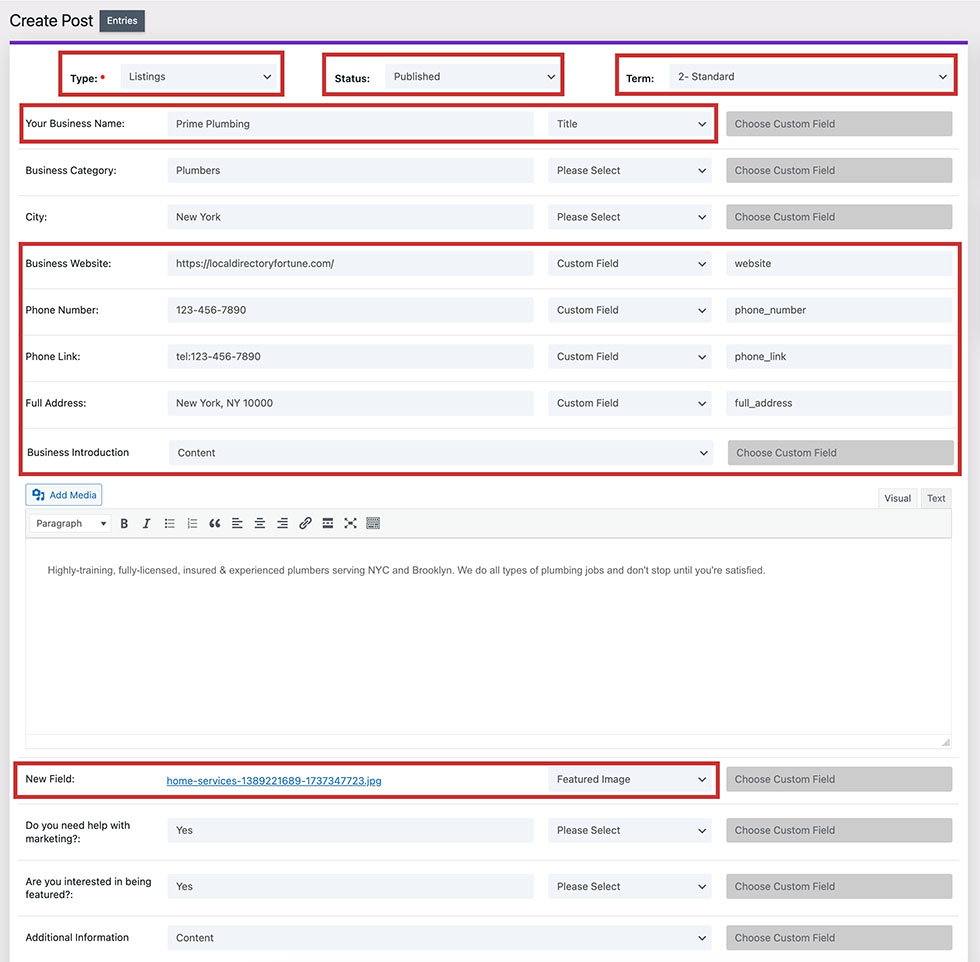
In the post creation interface, set the following:
- Type: Listings
- Status: Published
- Terms: Basic or Standard
- Your Business Name: Title
- Business Category and City: Leave as is (to be set later).
- Business Website: Custom Field – website
- Phone Number: Custom Field – phone number
- Phone Link: Custom Field – phone link
- Address: Custom Field – full address
- Business Introduction: Content
- Field with Image: Featured Image
Ensure you type and select the custom fields correctly to avoid errors.

After completing the setup, scroll down and click ‘Create Post’ to finalize the listing.
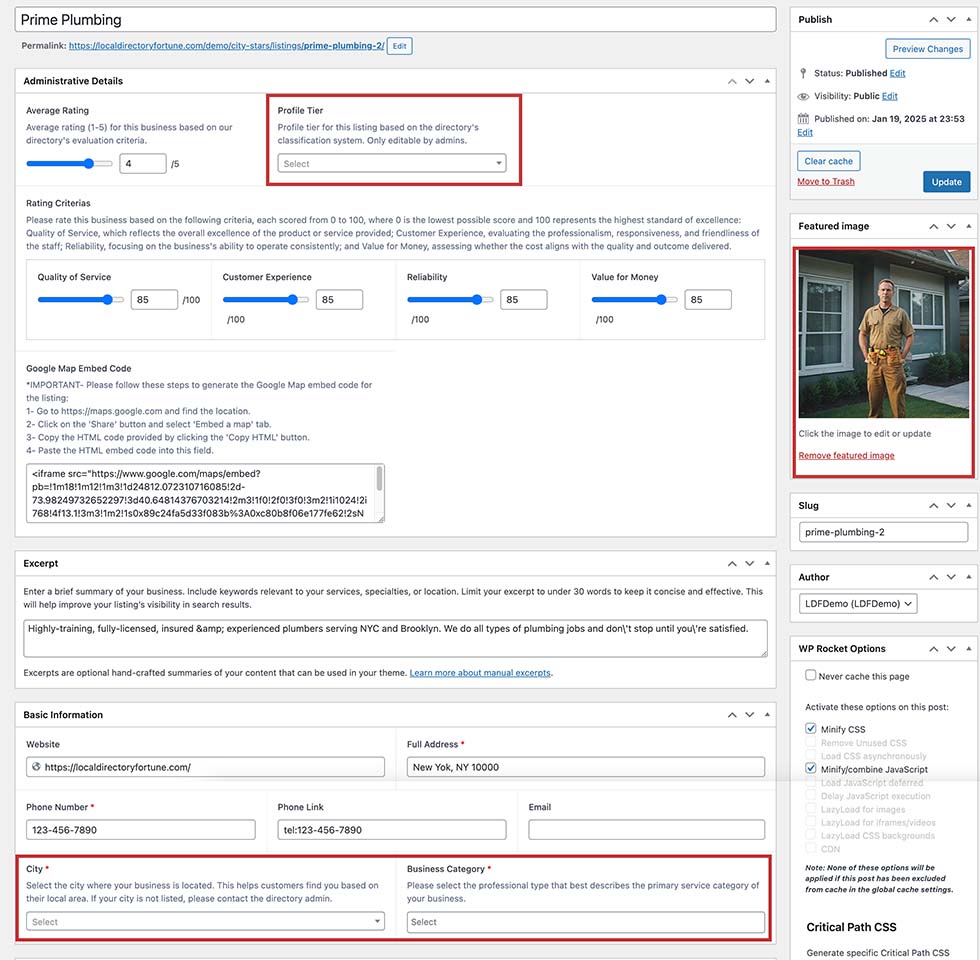
Once the post is created, click ‘Click here to Edit’ to open the post editor. Here, you can update any missing basic information that wasn’t assigned during the initial setup. Re-select the featured image if it’s not assigned correctly.

